Marking out
The process of ‘Marking out’ is the process of transferring shapes and lines to a piece of material. It is the first step in the manufacturing process and it provides guidance for cutting, bending or shaping. Accuracy is vital when marking out as it allows the product to assembly and function correctly. Selecting appropriate tools depending on the material your working with is also of the essence. For example you would never use a pencil to mark plastic or wood!
Starting with the basic tools that we use when marking out with any material these are the common tools used.
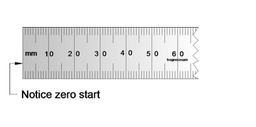
Steel rule – used for measuring length width, can also be used for measuring a tools certain distance e.g oddleg caliper or engineer divider.
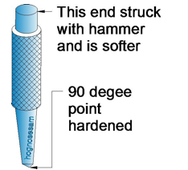
Centre punch - A centre punch, used for locating centres and making a dent in material before drilling. The dent helps to guide the drill so that it doesn't wander off the middle. It can also be used to make a dent so the engineer divide does not slip when marking circles on hard materials such as metals.
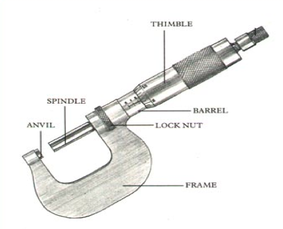
Mircometer – is used for high accuracy marking out and testing. The micrometer is used to measure small diameters and thickness of thin maters. Tends to be used with metal.
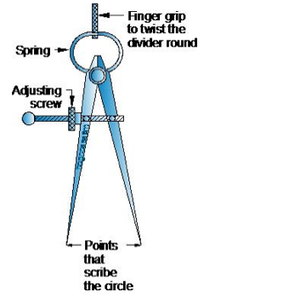
Engineer divider - is used for scribing arcs and circles on materials. The distance between the legs is set by placing them on a steel rule. A pair of compasses, as used in maths, could be used on wood for drawing circles and arcs.
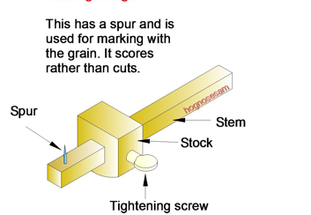
Marking Gauge – This tool is used for marking width and thickness of wood when preparing it to size. A face side is planed first, then a face edge then the marking gauge is set to width or thickness and used to mark off these ready for planing/sawing to size.
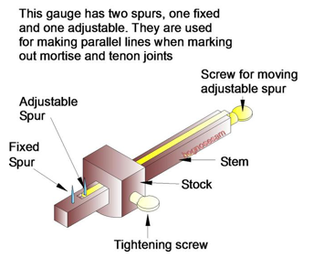
Mortise Gauge–this is used to mark out the position of a mortise (which is the pocket for a tenon joint.) This process prepares the wood for cutting with a mortise chisel. The spurs are set to the thickness of the tenon to make the fit more accurate.
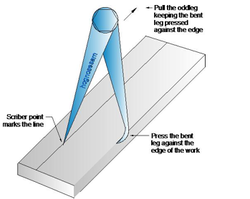
Oddleg Calipers- are set to distance by placing the bent leg against the end of a steel rule and stretching the straight leg to the length required. They then are used for marking parallel lines to an edge and if the work has two parallel edges it can be used to find the centre line.
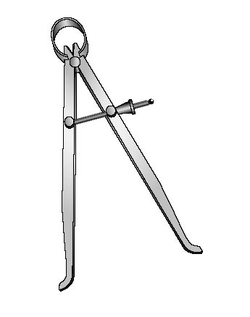
Inside calipers -are used for measuring the inside diameters of tubes.
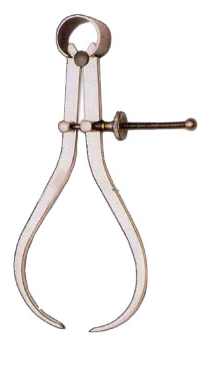
Outside calipers-are used for measuring the outside diameters of bars and tubes.
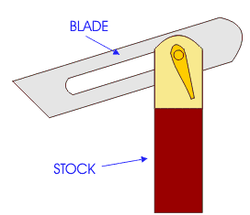
Sliding Bevel- Used for marking angles of different sizes. It has a stock and blade like a try square but the blade rotates so it can be set at an angle using a protractor. Marking angles on dovetail joints is a common use for this tool.

Mitre square- includes a blade fixed at a 45-degree angle. The other is angled at a 135-degree angle. The mitre square is the tool to use when you mark out a mitre, cut it, and then shot it to perfection with a shooting board.
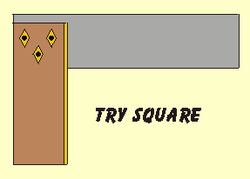
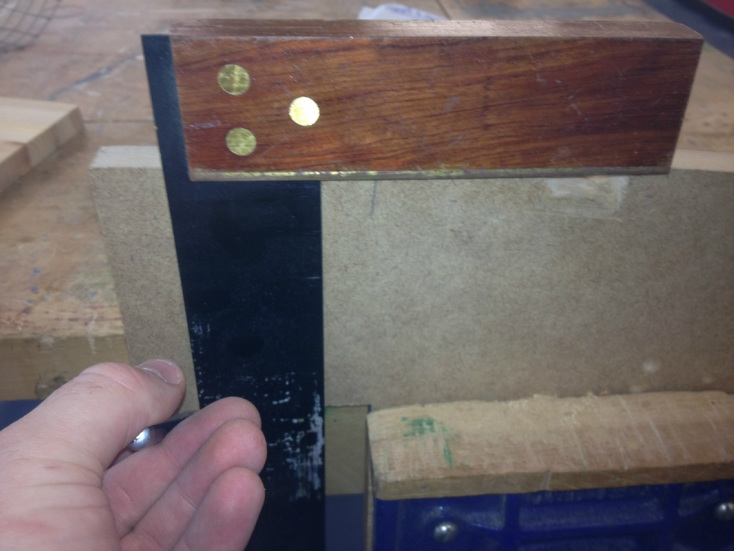
Try-square (Wood) – Can also be known as a cabinet maker’s try square. This tool is used on wood and it has a wooden handle or stock with a metal black. It is used for marking, measuring and testing 90 degree angles when prepared material to size.
Engineers square(Metal) – Similar to the Try-square this tool marks and tests 90 degree angles but only with metal.
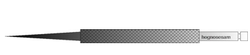
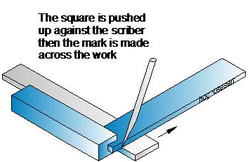
Scriber - Used for marking metals (pencil rubs off but a scriber scratches). Used with a try-square for marking lengths and widths.
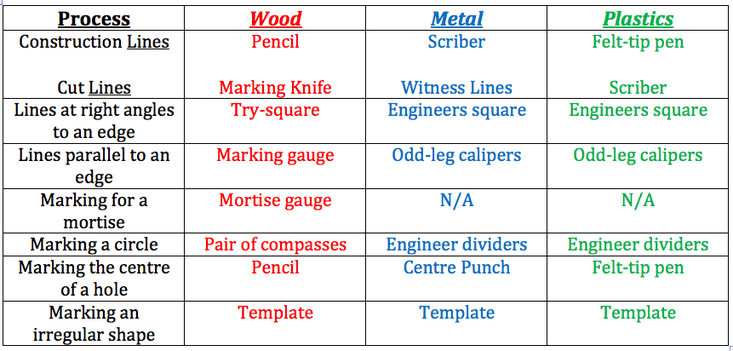
Common and generic principles for marking out with tools
This table displays the common process that you will undertake when marking out with the different materials.
Other Common principles and concepts
• Always hold the tool by the handle
• All of the wooden handles are used to mark wood
• All of the metal handles are to mark metal
• Always use the tool on a flat service or a straight/true edge to insure accuracy
• A steel rule, inside and outside calipers will always be used for every material to measure
• Cutting fluids, grease, chemicals should stay way from the wooden handles
• The engineers square has been hardened and tempered enabling it to be a lot thicker which means when you use a Scribber it is not going to slip whereas with the wooden handles the metals are a lot thinner
• On all materials you need be able to make the distinction between construction lines and cut lines
• Use a marking guage on wood and plastics or odd-leg calipers on metal and plastics to mark lines parallel to the true edges
• Mark out as clearly as possible to avoid mistakes
• Always shade the waste accurately and clearly
• Both the centre and dot punches are used in the same way. A ball pein hammer is used to tap the head of the punch and this delivers enough force to the point of the punch to put a small indentation into the surface of the material.
• When marking out metal use little arrows
• Look at the marking out from a birds eye view
• Both the centre and dot punches are used in the same way
• When marking with metal you can use Engineers blue to mark the surface of the material the markings appear a lot more clearer this way – when the work is finished the dye can be easily removed with white spirit and a rag
• A ball pein hammer is used to tap the head of the punch and this delivers enough force to the point of the punch to put a small indentation into the surface of the material.
Common Misconceptions
• When using the engineer divider if you have not punched dent using a dot punch or centre punch then the leg at the centre of the arc can slip
• The leg at the centre of the arc can be prevented from slipping by centre punching a dent in the centre of the circle
• The dot punch is a lighter and thinner version of the centre punch and is used basically for the same job. However, it is more accurately as the dot produced is smaller
• Using an incorrect tool with the wrong material can mark it
• It is vital to use the correct marker on a material. EG you would not use a Scriber on Plastic, as it will scratch the material
• Sometimes it can be difficult to see marks clearly which are drawn on polished metals – (engineers blue can fix this)
• Working out millimetres not cm (10mm equaling 1cm)
• Measure from the end of the rule (baseline)
• Pencils need to be sharp when drawing lines onto the material
• Looking after the tools will allow you to mark and measure accurately
Here is an example of me marking out a piece of wood